

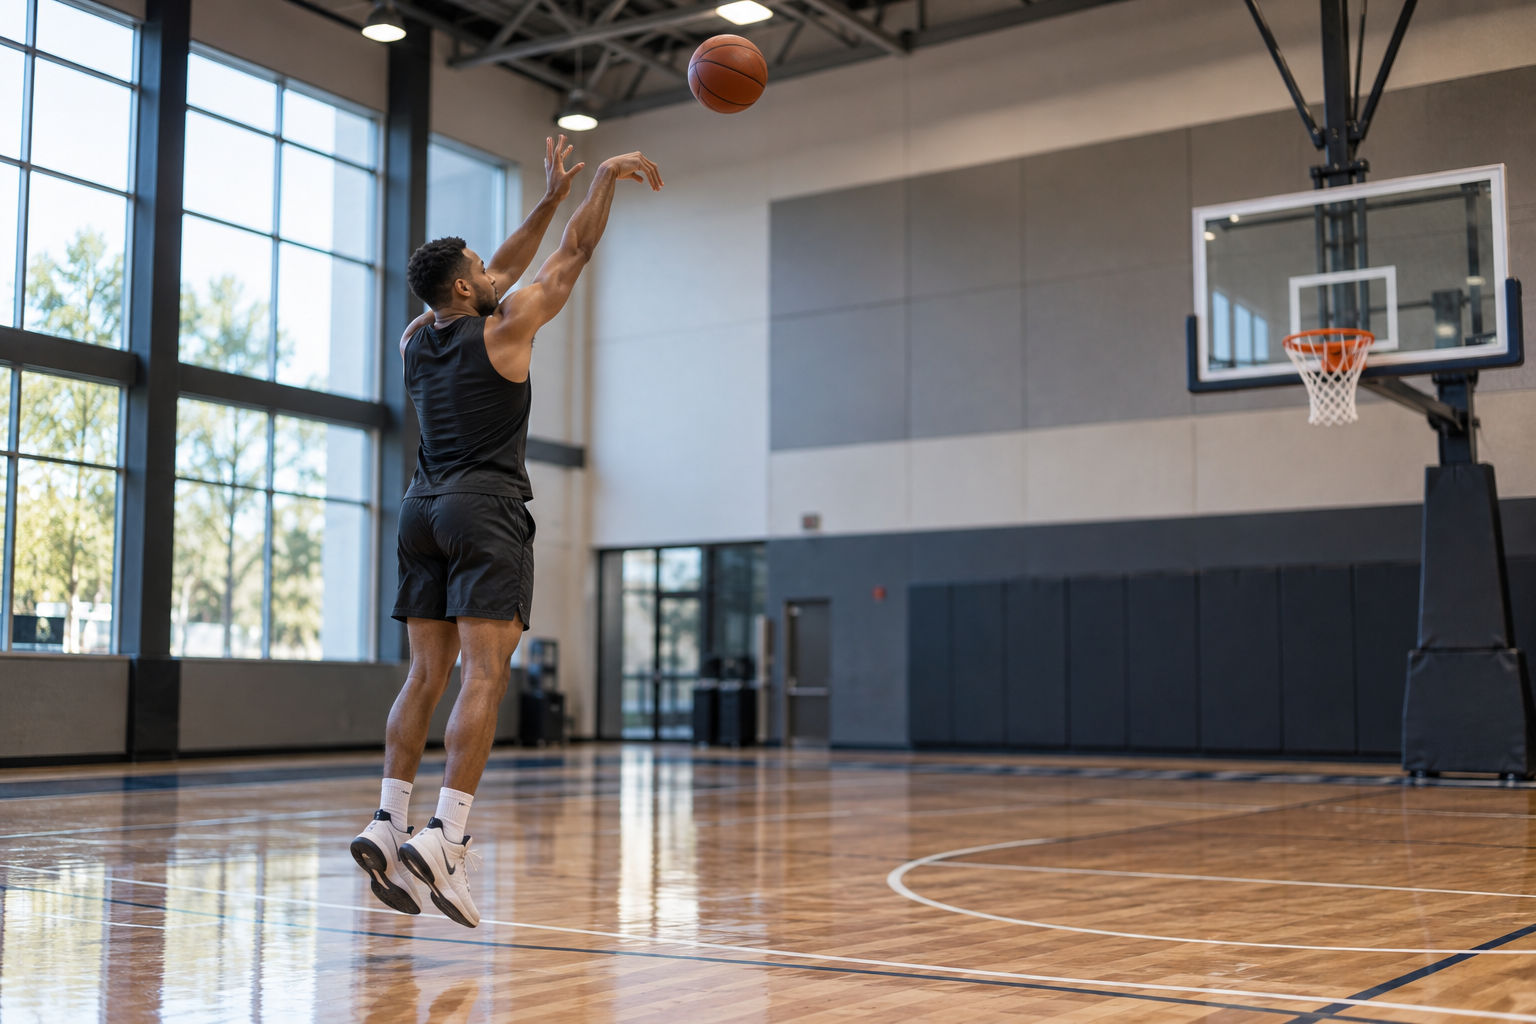
The Biomechanics and Anatomy of a Perfect Three Point Shot
A three-point shot may appear to be one smooth movement, but it is actually a carefully coordinated sequence involving the feet, legs, core, shoulders, elbow, wrist, and fingers. Every part of the body must contribute at the right moment to generate enough power while maintaining accuracy.
Players who understand how their bodies produce and transfer force can develop a more efficient shooting motion. Instead of relying only on repetition, they can identify mechanical problems, make purposeful adjustments, and build a shot that remains reliable under pressure.
Understanding the Three-Point Shot as a Kinetic Chain
The shooting motion begins long before the ball leaves the fingertips. Force starts at the floor and travels upward through the ankles, knees, hips, torso, shoulder, elbow, wrist, and hand. This connected sequence is known as the kinetic chain.
An effective perfect three-point shot uses energy from the entire body rather than depending mainly on the arms. When the lower and upper body work together, the shooter can reach the basket comfortably without sacrificing control.
Problems occur when one part of the chain moves too early or too late. If the legs extend before the ball begins to rise, some of their energy is lost. The arms must then compensate, often producing a flatter trajectory or an inconsistent release.
Why Rhythm Matters
Rhythm connects every stage of the shot. A smooth sequence allows energy to move continuously from the floor into the ball. A disrupted sequence creates pauses, unnecessary tension, or sudden acceleration.
Good shooters usually move the ball upward as their legs begin to extend. The exact timing differs between players, but the motion should feel connected rather than divided into separate actions.
The Role of the Feet and Lower Body
The feet create the foundation of the shot. They should provide balance, directional control, and enough stability for the player to rise vertically. Many right-handed shooters position the right foot slightly ahead of the left, while left-handed shooters commonly reverse that alignment.
The stance should feel natural rather than forced. The toes, knees, and hips generally need to face the same direction so the joints can flex and extend efficiently. Excessive twisting at the knees or hips may reduce power and make the release less repeatable.
Learning basketball shooting biomechanics helps players recognize that three-point range should come primarily from coordinated leg drive. The quadriceps extend the knees, the gluteal muscles extend the hips, and the calves help complete the upward push through the ankles.
Loading the Hips and Knees
Before the upward motion begins, the shooter should flex the hips and knees slightly. This creates an athletic loading position that stores energy for the jump.
The dip does not need to be extremely deep. A movement that is too shallow may limit power, while an unnecessarily deep squat can slow the release. The ideal depth allows the shooter to generate force quickly while keeping the head and torso controlled.
Core Stability and Body Alignment
The core transfers energy between the lower and upper body. Muscles around the abdomen, lower back, hips, and pelvis stabilize the torso as the player rises into the shot.
Core stability does not mean keeping the body rigid. The torso should remain controlled while allowing a natural upward extension. Excessive backward leaning changes the release angle and can cause the ball to fall short when the shooter becomes tired.
Players seeking to improve basketball skills should pay attention to their landing position. Ideally, the body should finish balanced, with both feet landing close together and slightly ahead of where they started. A dramatic sideways drift often indicates an alignment or balance problem.
Shoulder, Elbow, and Forearm Mechanics
As the ball rises, the shooting shoulder moves into flexion while the elbow bends underneath or slightly inside the ball. The forearm should approach a vertical position near the set point, creating a direct pathway toward the basket.
The elbow does not need to be forced perfectly beneath the center of the ball. Individual anatomy influences the most comfortable alignment. However, an elbow that flares excessively outward can introduce unnecessary sideways force.
Efficient three-point shooting technique keeps the shooting arm relaxed during the upward movement. Excessive muscular tension reduces touch and may cause the player to push the ball instead of releasing it fluidly.
The non-shooting hand supports the side of the ball and helps guide it into position. It should not produce forward force. If the guide-hand thumb pushes the ball, the shot may develop unwanted sidespin and inconsistent direction.
Choosing a Natural Set Point
The set point is the position where the ball transitions into the final extension of the shooting arm. For most players, it sits near the eyebrow, forehead, or slightly above the head.
A very low set point can make the shot easier to block. A set point placed too far behind the head may interrupt the kinetic chain. The best position allows the ball to continue moving upward without pausing.
Wrist Action, Finger Control, and Backspin
The wrist and fingers control the final direction and rotation of the ball. As the elbow extends, the wrist flexes forward and the fingers guide the ball toward the rim.
The ball should roll primarily from the index and middle fingers, although the exact balance varies slightly between shooters. A relaxed wrist snap creates clean backspin, which helps stabilize the ball during flight and can produce a softer contact with the rim.
Strong efficient shooting mechanics end with the fingers pointing toward the basket and the wrist relaxed. The shooting arm should remain extended briefly after release. Holding this position gives the player valuable feedback about alignment and follow-through.
The release should not involve squeezing the ball or snapping the wrist with maximum force. Touch comes from controlled acceleration and relaxed finger action rather than muscular strain.
Release Angle and Ball Trajectory
A successful three-point attempt needs enough height to enter the rim at a favorable angle. A flat shot presents a smaller effective target and often creates hard rebounds. An excessively high arc may require more force and become difficult to control.
The ideal trajectory depends on the player’s height, release point, distance, and shooting style. Instead of trying to copy one universal angle, players should look for an arc that clears defenders while reaching the basket comfortably.
Developing consistent long-range accuracy requires a stable release point. When fatigue causes the release to drop or move forward, trajectory and distance control usually change as well.
A shooter should also keep the eyes focused on a precise target. Some players look at the front of the rim, while others prefer the back or center. Consistency matters more than the specific choice.
Common Biomechanical Errors
One common mistake is allowing the knees to collapse inward during the loading phase. This weakens the base and may place unnecessary stress on the joints. The knees should track naturally over the feet as the player bends and extends.
Another problem is using excessive arm force. When the lower body does not contribute enough energy, the shoulders and triceps must work harder. This often leads to a rushed release, reduced touch, and inconsistent range.
Players may also rotate too far in the air. A small natural turn can support comfortable shoulder alignment, but uncontrolled rotation makes it difficult to send the ball along a straight path.
Thumb interference from the guide hand is another frequent issue. Visible sidespin, an uneven follow-through, or the guide hand moving forward with the shooting hand may reveal this problem.
Training the Movement Efficiently
Effective shooting practice begins close to the basket. Form shooting allows players to concentrate on balance, alignment, wrist action, and a clean release without using excessive force.
Once the motion becomes stable, the player can move backward gradually. Distance should only increase while the same rhythm and technique can be maintained. Practicing poor form from long range teaches the body to repeat compensation patterns.
Purposeful basketball shot development should include stationary attempts, footwork into the catch, shots after movement, and game-speed repetitions. Each progression adds complexity while preserving the underlying mechanics.
Recording practice from the front and side can reveal details that are difficult to feel. Players can examine foot alignment, dip depth, elbow position, release timing, body drift, and landing balance.
Building a Repeatable Practice Routine
Begin each session with relaxed one-hand form shots near the rim. Add the guide hand only after the shooting hand produces clean alignment and backspin.
Progress to mid-range shots before stepping behind the three-point line. Finish with game-like attempts from several locations, including shots after catches, directional footwork, and controlled changes of pace.
Quality matters more than simply accumulating attempts. A smaller number of focused repetitions can be more valuable than hundreds of rushed shots performed with unstable mechanics.
Creating a Shot That Works Under Pressure
The anatomy of an excellent three-point shot is based on coordination rather than isolated strength. The feet establish balance, the legs generate force, the core transfers energy, and the upper body directs the ball.
No two shooters have identical limb lengths, mobility, strength, or timing. The goal is therefore not to imitate another player perfectly. It is to develop a biomechanically efficient motion that fits the individual athlete and can be repeated at game speed.
When balance, rhythm, alignment, and relaxation work together, long-range shooting becomes less physically demanding. Consistent practice then transforms those mechanics into an automatic skill that remains dependable when defenders close out and the pressure rises.